When your new to makeup you my tend to feel like your drowning in a sea of creamy foundation and gel eyeliner, trying to find an exit in an eye shadow and primer maze or defusing an eyelash curler bomb. Instead of running head first into the makeup world and becoming plagued with new creams and powders, its best to take a few small steps and GET BACK TO BASICS.
When beginning your makeup its best to first prepare your skin. This means its time to exfoliate, clean and moisturize. It’s best to make sure that the skin is ready and healthy before makeup so that you have your best complexion at hand.
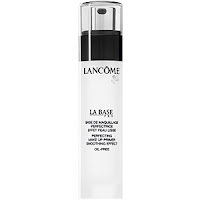
To begin with first apply a small amount of Primer to the palm of your hand; rub a thin coat on to the surface of your face.
The primer will act as a thin shield between your face and makeup which will protect your pores from being clogged while allowing an easier application of further added makeup.
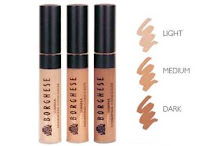
Next is Concealer. Apply a fine coverage to any unwanted fault in your skin’s complexion. This may include under eye circles, pimple marks or uneven skin tone. The concealer will act as a mask to hide these flaws.
After preparing the skin it’s now time to apply liquid and powder foundation. First begin by applying a small amount to the palm of your hand. Using either a brush, sponge or your finger tips rub a thin layer into your skin. Make sure to massage the foundation in well, covering under the chin and into the hair line so no make up lines are visible. Liquid foundation is a great way to get a stronger lasting coverage. After applying the liquid foundation begin to use your powder foundation. The powder will give a matt finish to your skin which allows it to appear more natural. After you have dipped your brush into the powder, tap of the excess and slowly coat a thin coverage over your skin.
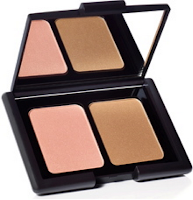
Now its time to focus on highlighting the features of your face. First we will begin with your cheeks. Here we will start to apply blush and bronzer to add colour depth and sculpt the face by highlighting your cheek bones. After applying a thin application of bronzer to your brush slowly work from the top of your ear lope to just before the tip of your mouth. Use light strokes that slowly cup under your cheek bone. Keep stroking until you are satisfied with the colour depth. After you have applied the bronzer places a light covering of blush on your brush. Sweep this over the apples of your cheeks to provide a natural glow to your face.
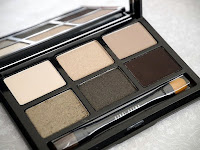
Now its time to focus on your eyes. The colours you use will depend on the time of day, your skin tone and the outfit you will be wearing. But today we will go for the basic browns, a daylight tone that can go with most outfits. First brush a shade of eye shadow (that is slightly lighter than your skin tone) from your eyebrow to your eyelashes. This will open up your eyes making them look bigger and fuller. Next use a neutral tone of eye shadow and brush this along the crease of your eye. This will define your eyes giving then depth. Highlight your eyebrows by brushing a soft shade of pearl eye shadow under the eyebrow. Begin to apply a light touch of eye shadow (the same colour that was applied to the crease) along the bottom of the eye and finish this with a light addition of eye shadow (the same colour used first on the brows to lashes) to the tear ducts. Finally place a darker eye shadow tone to the outer corners of your eyelid. Apply Liquid eyeliner, mascara and if desired false eyelashes. Make sure when applying fake eyelashes to always curl with an eyelash curler and apply mascara after placing them along the eyelash line.
Next move on to your eyebrows. Using an eye shadow that is close to your natural eyebrow colour stroke this into the hairs. This will define your eyebrow shape.
Last is your lips. This can be done in two ways. Depending on your look you can go subtle with a light layer of lip gloss or give your lips a deep pout using lip liner and lipstick. First trace your lips with a lip liner (the colour is up to you but the classic red or pink is always a good and easy choice). Slowly brush the lip liner into your lips and finish it of with lipstick.
And TADA! You are finished. You can mix up this look with different colours depending on your mood!
Picture Taken From: